


A well-sharpened knife is an essential kitchen tool that can make all the difference in your cooking experience.
Over time, even the highest-quality knives will dull with regular use, turning a simple task into a frustrating chore.
A dull knife not only slows down your work in the kitchen but also increases the risk of injury.
It requires more force to cut through food, which can lead to slips and accidents.
A properly sharpened knife can cut through anything with precision and will help extend its lifespan.
In this guide, we will take a closer look at the art and science of sharpening kitchen knives.
We will also cover the important aspects of knives and a step-by-step guide to sharpening your knives using different methods.
We will also discuss different ways to maintain your knives after sharpening to ensure they stay in prime condition.
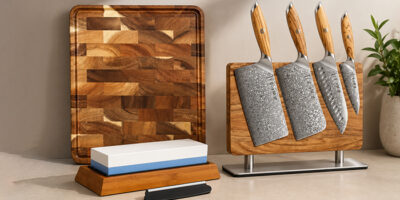
Tools You Need for Sharpening Knives
When it comes to sharpening kitchen knives, having the right tools can make a significant difference in achieving a razor-sharp edge.
Now we will explore 3 tools you can use for sharpening knives, along with their benefits.
Whetstone

Whetstones, also known as sharpening stones, are one of the most traditional and effective tools for sharpening knives.
They come in various grits, ranging from coarse (for repairing damaged edges) to fine (for honing and polishing).
Benefits
- Allows for precise control over the sharpening angle and pressure.
- Can be used on a variety of knife types and edge styles.
- Promotes a high-quality edge when used correctly.
Honing Steel

Honing steels are long, thin rods typically made of steel, ceramic, or diamond.
They are used to realign the edge of the blade rather than to sharpen it.
Benefits
- Helps maintain sharpness between sharpening sessions by realigning the blade edge.
- Quick and easy to use, ideal for everyday maintenance.
- Can extend the life of your knives with regular use.
Electric Sharpener
Electric sharpeners are motorized devices that automatically sharpen knives through rotating abrasive wheels.
They come with preset angles for ease of use.
Benefits
- Fast and efficient; great for those who prefer a quick solution.
- Minimal skill required, suitable for beginners.
- Consistent results with less effort.
Step-by-Step Guide to Sharpen Knives with Different Tools
Keeping your kitchen knives sharp is crucial for safety and efficiency.
Below is a detailed guide on how to sharpen knives using three different tools: a whetstone, honing steel, and an electric sharpener.
Method 1: Sharpening Knives with Whetstone
Preparation
Soak the whetstone in water for about 10-15 minutes if it’s a waterstone.
This helps lubricate the surface and prevent the blade from overheating.
Positioning
Place the whetstone on a stable surface, ensuring it doesn’t slip.
Set the coarse side facing up for initial sharpening.
Sharpening
Hold the knife at a 20-degree angle to the stone.
Starting from the heel, slide the blade across the stone in a sweeping motion toward the tip.
Apply moderate pressure and maintain the angle throughout the process.
Repeat this motion 5-10 times, then switch to the other side of the blade and repeat.
Honing
Flip the stone to the fine side and repeat the sharpening process to hone the edge.
This step refines the blade for a smoother finish.
Cleaning
Rinse the knife and the whetstone to remove any metal shavings.
Wipe the blade with a cloth to ensure it’s clean and ready for use.
Safety Tips
Always keep your fingers away from the blade edge while sharpening.
Use a stable surface to avoid slipping, and wear cut-resistant gloves if necessary.
Testing Knife Sharpness
There are two main sharpness testing methods for knives:
- Paper Test: Try slicing through a piece of paper. A sharp knife should cut cleanly without tearing.
- Tomato Test: Gently press the knife against a tomato. A sharp knife will pierce the skin effortlessly.
Method 2: Sharpening Knives with Honing Steel
Preparation
Ensure the honing steel is clean and dry.
Hold the steel vertically, placing the tip on a stable surface, such as a countertop or cutting board.
Positioning
Hold the knife by the handle with the blade at a 15-20 degree angle against the honing steel.
Sharpening
Starting at the heel of the blade, swipe the knife down the length of the steel, applying light pressure.
Pull the knife towards you, moving from the heel to the tip.
Repeat this motion 5-10 times on each side of the blade to ensure even alignment and sharpness.
Safety Tips
Keep your fingers away from the blade edge while sharpening.
Maintain a firm grip on both the knife and the honing steel to prevent slipping.
Testing Sharpness
Test the sharpness of your knife by attempting to slice through a piece of paper.
A sharp knife should cut the paper effortlessly.
This process of sharpening kitchen knives can be done frequently to maintain a fine edge.
Method 3: Sharpening Knives with Electric Sharpener
Preparation
Read the manufacturer’s instructions specific to your electric sharpener model.
Make sure that it is plugged in and ready for use.
Positioning
Place the electric sharpener on a flat, stable surface.
Make sure there’s enough space around it to move the knife skillfully.
Sharpening
Insert the knife blade into the designated slot of the sharpener, ensuring it’s aligned properly.
Gently pull the knife through the sharpener while applying light pressure, following the manufacturer’s instructions for the number of passes required.
Most electric sharpeners will have multiple slots for coarse and fine sharpening, so use them with your needs.
Cleaning
After sharpening, wipe the knife with a damp cloth to remove any metal shavings and ensure it’s clean.
Safety Tips
Keep fingers away from the sharpener’s moving parts.
Avoid forcing the knife through the sharpener and let the machine do the work.
Testing Sharpness
Similar to the other methods, test the sharpness by slicing through a piece of paper or a tomato. If it cuts smoothly, your knife is ready for action!
Key Parts of a Knife
Understanding the key components of a knife can significantly improve your knowledge of sharpening kitchen knives.
Here are the main parts:
Blade
The blade is the most important part of the knife, made of metal and designed for cutting.
It typically has a sharp edge that is honed to a fine point for slicing and chopping.
Spine
The spine is the top, unsharpened part of the blade, providing strength and stability.
A thicker spine often indicates a more robust knife.
Edge
The edge is the sharpened side of the blade that does the actual cutting.
The angle of the edge can vary between different knife types (e.g., chef’s knife vs. paring knife), affecting how sharp and durable it is.
Tip
The tip is the front end of the blade and is often used for precision cuts and piercing.
It’s crucial for detailed work like mincing herbs or cleaning shrimp.
Heel
The heel is the rear part of the blade, closest to the handle, used for cutting tasks that require more force.
It is used for chopping through tougher ingredients like thick vegetables and bones.
Tang
The tang is the portion of the blade that extends into the handle, providing balance and strength.
A full tang, where the blade runs the entire length of the handle, is preferred for better control and durability.
Bolster
The bolster is the thick junction between the blade and the handle.
It provides balance and helps protect the fingers from slipping onto the blade while cutting.
Handle
The handle provides a grip for the user.
It can be made from various materials, including wood, plastic, or metal.
A comfortable and well-designed handle is essential for effective and safe knife handling.
Understanding Different Knife Edges
Knives come with different edge styles, each designed for specific cutting tasks.
Here are some of the most common knife edge types:
Straight Edge
A straight edge is the most common type of knife edge found on kitchen knives, such as chef’s knives and paring knives.
It features a uniform cutting surface that runs along the length of the blade.
Uses:
Ideal for slicing, chopping, and dicing various ingredients, including vegetables, fruits, and meats.
Provides precision for complicated tasks like mincing herbs or julienning vegetables.
Serrated Edge
The serrated edge has a series of jagged teeth along the blade.
This design allows it to grip and cut through tougher surfaces without crushing the food inside.
Uses:
Perfect for slicing bread, as the serrations can easily penetrate the crust without squashing the soft interior.
Effective for cutting through foods with a hard exterior and soft interior, like tomatoes and citrus fruits.
Granton Edge
The Granton edge features a series of oval-shaped hollows along the blade.
This design lowers friction and keeps food from sticking to the blade during the process of cutting.
Uses:
Excellent for slicing meats, especially roasts, as it allows for clean cuts and reduces drag.
Useful for chopping and slicing vegetables, particularly starchy ones like potatoes.
Knowing the different types of knife edges is crucial when considering sharpening kitchen knives.
Each edge style requires specific techniques for sharpening to maintain its intended functionality.
Understanding these differences will enable you to effectively care for your knives and enhance your culinary skills.
Maintaining Your Knives After Sharpening
Maintaining sharp kitchen knives is essential for both safety and efficiency in the kitchen.
A well-maintained knife not only enhances your cooking experience but also minimizes the risk of accidents.
With the right sharpening techniques and regular maintenance, your knives can remain in optimal condition for years.
Remember to hone your knives frequently using a whetstone, honing steel, or electric sharpener.
After each use, clean your knives with mild soap and water, and dry them immediately to prevent rust and corrosion.
You can properly store the knife using a knife block, magnetic strip, or protective sheath to preserve the blade and prevent dulling.
ElitePro Cutlery offers some of the premium sharpening tools to help you keep your blades sharp and effective.
So make sure to invest in high-quality tools for sharpening your kitchen knives!
